uTorrent or more correctly the µTorrent is the most widely used BitTorrent client out there. uTorrent supports both Windows and Linux operating systems. But for Linux only, it comes as uTorrent server. This video tutorial will show you how to install uTorrent on an Ubuntu 20.04 LTS machine.
Development of uTorrent server seems to have been abandoned by its developers a long time ago. The last version of uTorrent for Linux was released 8 years ago. And it’s indicated that it supports up to Ubuntu 13.04. But we’ve previously installed uTorrent on Ubuntu 16.04 LTS without any issues.
We wanted to try it out on Ubuntu 20.04. And we were able to successfully install uTorrent on Ubuntu 20.04 LTS with some small workaround. Let us guide you through it in this post.
Prepare Ubuntu 20.04 LTS for uTorrent Server
Be it an Ubuntu 20.04 server or Ubuntu 20.04 Desktop, the installation procedure is the same. We will be using Ubuntu command line terminal for this tutorial. You can launch terminal by hitting CtrlAlt + T keys on your Ubuntu 20.04 desktop. If you’re using an Ubuntu 20.04 server to install uTorrent, you need to login to your server as root using Putty.
Once you’re connected to the command line interface of your machine, execute following commands to update APT cache.
apt update
apt upgrade
Next, remove any obsolete packages from the machine.
apt autoremove
And then a reboot,
reboot
Connect to the CLI once your machine comes back online. Now we’re ready to install the dependencies required by uTorrent. Following commands will take care of them.
apt install libssl-dev
wget http://archive.ubuntu.com/ubuntu/pool/main/o/openssl1.0/libssl1.0.0_1.0.2n-1ubuntu5_amd64.deb
sudo apt install ./libssl1.0.0_1.0.2n-1ubuntu5_amd64.deb
Now we will create new Ubuntu user named vpsfix with no root privileges to run uTorrent on our machine.
adduser --system --group vpsfix
We’ll comeback to using this user account with uTorrent a bit later on this tutorial.
Install uTorrent on Ubuntu 20.04 LTS
Like I said before, the latest version of uTorrent for Ubuntu was released for Ubuntu 13.04. But with all the dependencies in place, we will be able to install uTorrent on Ubuntu 20.04 as well. We’ll use the same installation package that was provided for Ubuntu 13.04. Let’s download it,
wget http://download-hr.utorrent.com/track/beta/endpoint/utserver/os/linux-x64-ubuntu-13-04 -O utserver.tar.gz
Extract the downloaded file to /opt directory.
tar xvf utserver.tar.gz -C /opt/
Create a link from uTorrent to /user/bin directory.
ln -s /opt/utorrent-server-alpha-v3_3/utserver /usr/bin/utserver
That mostly completes the installation. But we’ll register uTorrent as a service before launching it.
Register uTorrent as a Service on Ubuntu 20.04 LTS
Registering uTorrent server as a service on the Ubuntu 20.04 LTS machine gives us an easy way to manage it. Plus, we can enable auto start so that the uTorrent server starts with a system reboot. Let’s create a systemd service for uTorrent with following command.
nano /etc/systemd/system/utserver.service
Paste the following lot,
[Unit]
Description=uTorrent Server
After=network.target

[Service]
Type=simple
User=vpsfix
Group=vpsfix
ExecStart=/usr/bin/utserver -settingspath /opt/utorrent-server-alpha-v3_3/
ExecStop=/usr/bin/pkill utserver
Restart=always
SyslogIdentifier=uTorrent Server

[Install]
WantedBy=multi-user.target
Close the file by hitting Ctrl+X keys. Then reload systemd.
systemctl daemon-reload
Let’s fix the file permissions before we start uTorrent.
chown vpsfix:vpsfix /opt/utorrent-server-alpha-v3_3/ -R
Manage uTorrent Server on Ubuntu 20.04 LTS
We’ve successfully installed uTorrent on Ubuntu 20.04 and registered it as a service on previous steps. Let’s enable auto start for uTorrent with following command,
systemctl enable utserver
We can start uTorrent with following command,
systemctl start utserver
We can check if the uTorrent server is already running with following command,
systemctl status utserver
And if you want to stop uTorrent service, you can use following command,
systemctl stop utserver
Finally, to disable the auto start, you can execute following command,
systemctl disable utserver
Access uTorrent Server with Web UI
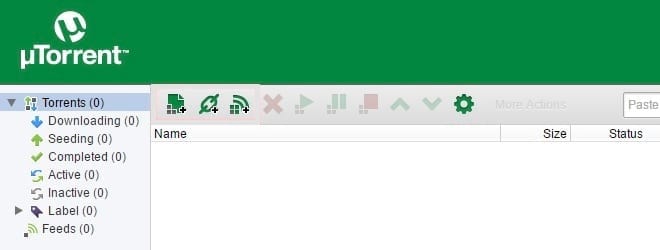
 uTorrent server doesn’t come with a GUI even on the desktop versions of Ubuntu. You have to access it using your browser. If you have installed uTorrent on your local Ubuntu machine, you can use following address to access uTorrent Web UI.
https://localhost:8080/gui/web/index.html
If you installed uTorrent server on an Ubuntu VPS, you can use following URL.
https://ipaddress:8080/gui/web/index.html
Remember to replace the ipaddress with your servers’ actual IP address. A pop up will open asking for a username and a password. The default username for uTorrent is admin and leave the password field blank. Hit enter and you’ll be logged in to your uTorrent Web UI.
Configure uTorrent Server with Web UI
Although uTorrent is up and running on Ubuntu 20.04 LTS, we need to configure few things before we can use it. We need to configure the default download directory in uTorrent Web UI since we’re using a non-root user named vpsfix to run it.
Let’s create a directory to hold the downloaded files.
mkdir /home/vpsfix/downloads
Grant directory ownership to vpsfix user.
chown -R vpsfix:vpsfix /home/vpsfix
Now, login to uTorrent Web UI and click the gear icon to navigate to settings menu. Then select Web UI on the left menu. You can change both the username and password, which is more secure than using admin as the username.
Next, go to the Directories menu from left sidebar and set default directory for downloads to the directory we just created.
That’s it for the setup. Now you can login and download torrents to your Ubuntu 20.04 machine. Downloaded files will be saved on the directory you created earlier in this step.


