WordPress is the most popular blogging platform. More than 60 million webmasters around the world use WordPress as their blogging software. It’s very easy to and Install. If you are new to WordPress and want to set up your first self-hosted WordPress blog, you’re at right place. This post has Step-by-Step guide to set up WordPress.
Although it’s a very easy process, it needs some computer knowledge to get through first time. I’m going to assume that you already have a Domain name and compatible hosting. If you don’t have these two, you need to get it before you can install WordPress. In such case read my earlier posts about Buying a Domain Name and Choosing a Web Host.
Download WordPress Installation Files
Start the process by downloading latest release of WordPress form wordpress.org. Extract the downloaded file to a local folder. Desktop will be handy, because it’s quickly accessible on desktop. Now we need to upload all files in extracted folder to our hosting account.
Upload WordPress Installation Files to Hosting Account
Open your favorite FTP program and enter your FTP information. FTP information usually sent with your hosting setup email. Check your inbox, if you don’ already have your FTP username and FTP password. This is different from your hosting account username and password.
What is FTP? How can I find FTP information?
FTP is used to transfer files between Computers on a Network. We can use FTP to exchange files between our Computer and Hosting Account. To learn more about FTP and find your FTP information read my post about “Using FTP”
After entering correct FTP information click ‘Connect’ button. In few seconds you will be connected to root folder of your hosting account. Change to your web folder and upload all files in WordPress director to web root. If you plan to set up WordPress on a sub folder, you need to upload all files to that folder. For example, if you need WordPress to run on http://mydomain.com/blog/ instead of http://mydomain.com/ you need to create directory called ‘blog’ on your web root and upload WordPress files to that folder.
When uploading WordPress files, Make sure you only upload files inside WordPress directory. Uploading WordPress directory will create folder called WordPress 3.x.x on your server and WP will continue run on http://mydomain.com/worpress 3.x.x/ instead of http://mydomain.com/.
Upload will take few minutes. In meantime, let’s create MySQL database and user for WordPress.
Create MySQL Database and assign User Privileges
WordPress uses MySQL database to store all important data on your blog. Data like Usernames, Passwords, Posts and Pages are securely kept inside a MySQL database. WordPress will not work without MySQL database. To create a database for WordPress, go to your hosting Control Panel and select Databases (or anything similar, this depend on Control Panel your host is using).
Most hosting companies use cPanel as their hosting control panel. While industry giants like NameCheap use Customized control panels.
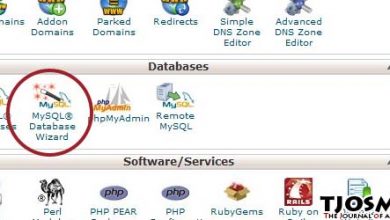
From databases, select MySQL. Then if you’re on cPanel select ‘Database Wizard’, if you’re on Go Daddy click ‘Create New Database’. Setup will ask you for some info like, Database Name, Database User, Database Password and Hostname. Change those fields as you like, but don’t change hostname field. If your Hostname field is empty, just type localhost. Make a note of your Database Name, Database User, Database Password and Hostname. We’ll need it to run WordPress setup.
Running WordPress Installer
After uploading all installation files to your hosting account, Open your domain in browser. You will be redirected to WordPress Installer. Follow onscreen instructions to install WordPress. Enter database info we just created. After that, setup will ask for admin username and password. Now it should be fine. You got your brand new WordPress blog. You’re ready to blog!
If anything goes wrong, let me know. I will help.


