
Cron Jobs are an important part of WordPress. Developers run into missed publish schedules, failed WordPress auto-updates and all kind of errors when cron jobs aren’t working properly. Luckily Virtualmin gives us a nice interface to set up cron jobs using Ubuntu crontab. This post will show you steps to set up WordPress cron jobs with Virtualmin.
WordPress handles cron jobs with wp-cron which checks for scheduled tasks on every page load. And it then executes due tasks on the same page load. This will make that certain page slow for the user who requested it. Not a big problem. But every plugin you use adds its bits to scheduled tasks. Some plugins spam wp-cron with scheduled tasks. This can lead to slow overall performance of your website. These are some scheduled events on vpsfix.com.
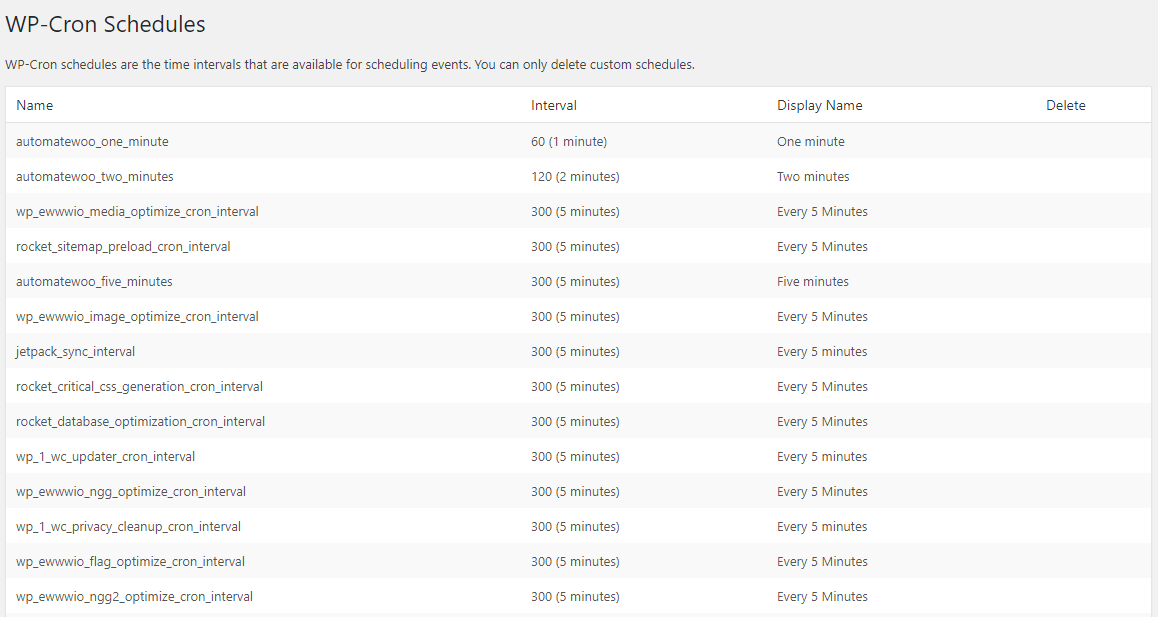
These cron jobs are essential to our sites. We can’t get rid of them without sacrificing some functionality. Which is the case with caching. When users are served cached pages wp-cron can’t check for or execute scheduled tasks. Because WordPress will not be called. So you’ll lose some functionality. These functions can be scheduled posts or scheduled backups, or something else more important.
In either case, best thing to do is let Ubuntu’s crontab handle WordPress cron jobs. It’ll make sure scheduled tasks are executed regardless if there are any page loads. And it will certainly take some load off of your WordPress installation.
Now that you know why it’s important, you can follow below instructions to set up WordPress cron jobs with Virtualmin. You’ll have to have your VPS configured with Virtualmin and WordPress installed.
Disable wp-cron
You should disable wp-cron before adding WordPress cron jobs to Ubuntu crontab. This is as easy as adding a simple line of code to wp-config.php. You can edit this file using your ftp client. But I’m sticking with CLI for this tutorial. Login to your server with domain admin user account and open wp-config.php file with nano text editor.
nano $HOME/public_html/wp-config.php
And add following line,
define('DISABLE_WP_CRON', true);Save and exit. Wp-cron is now disabled on your website. Some plugins will display a warning about this on their respective settings pages. You can safely ignore them after you set up WordPress cron jobs with Virtualmin following below instructions.
Setup Cron Jobs with Virtualmin
You can now go ahead to add WordPress cron jobs in Virtualmin. Login to Virtualmin as root user. We’re going to use root user account because we need to be able to run cron jobs as www-data. Regular Virtualmin users can’t run cron jobs as someone else.
Moving on, you’ll land on Virtualmin section when you login. Switch to Webmin from the top-left corner. You’ll find cron jobs section under Webmin > Scheduled Cron Jobs.
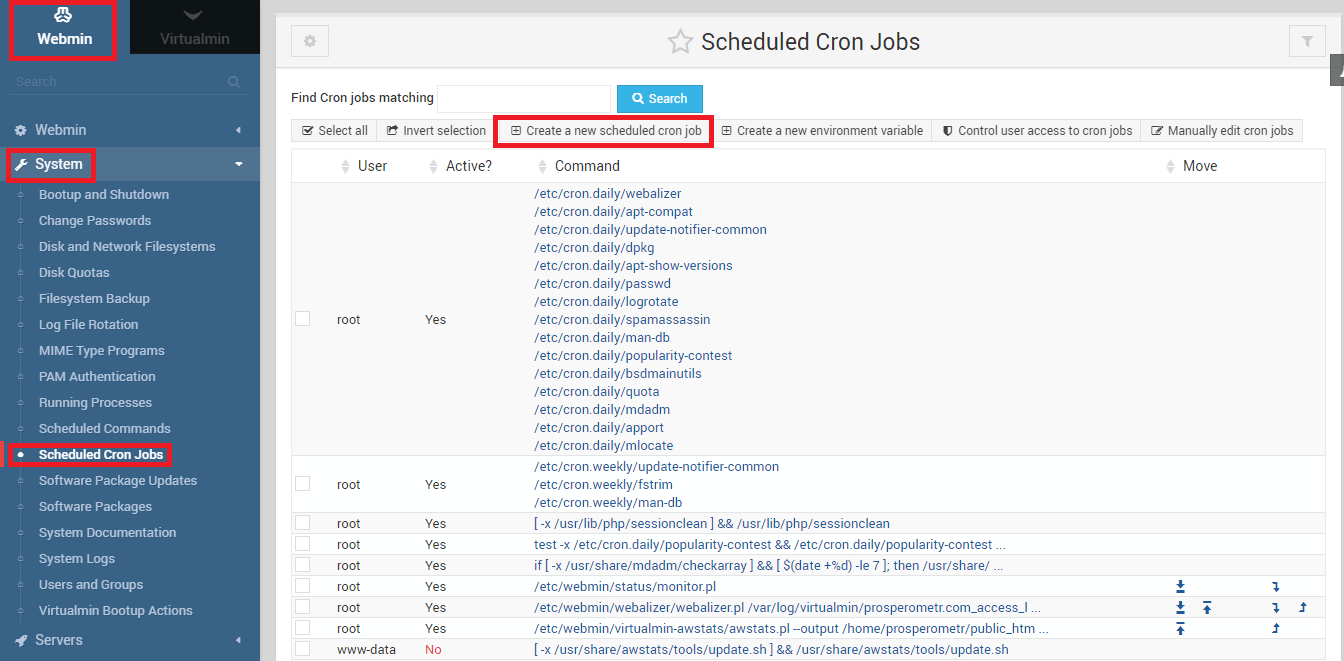
This page will display a list of existing cron jobs. You can add, edit, disable and delete cron jobs from here. Click Create a new scheduled cron job button to go to Create Cron Job screen. There are three sections on the Create Cron Job page. First section is,
Job Details
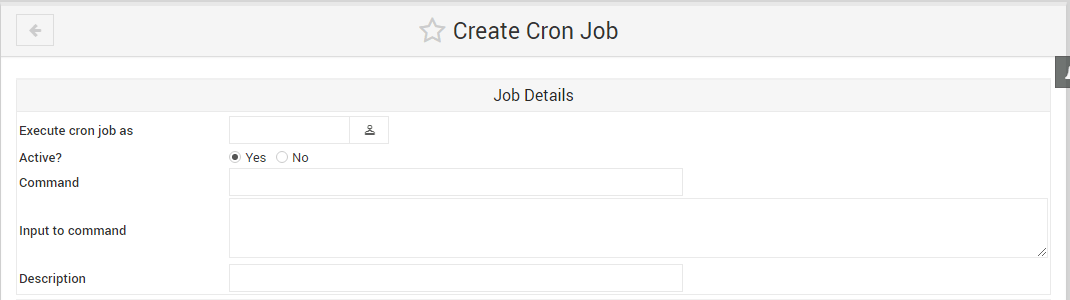
As I said before, you should setup WordPress cron jobs to run as www-data. So type www-data in the text field next to Execute cron job as. We want it active, so tick Yes. And paste the following line in the Command text field. Change the path to your domains public_html directory.
cd /home/AdminUser/public_html; php wp-cron.php?doing_wp_cron > /dev/null 2>&1
You can leave Input to command and Description fields empty. Which will take us to the next section,
When to execute
This section looks bit complicated, but it really isn’t. You are given 2 options to schedule your command. Simple schedule and Times and dates selected. You can schedule WordPress cron jobs to execute hourly, daily, monthly, etc… with Simple schedule. But that’s not what we’re looking for. Every 10 minutes is ideal for WordPress cron jobs. So tick Times and dates selected below .. and then tick Selected under Minutes like shown in the image below.
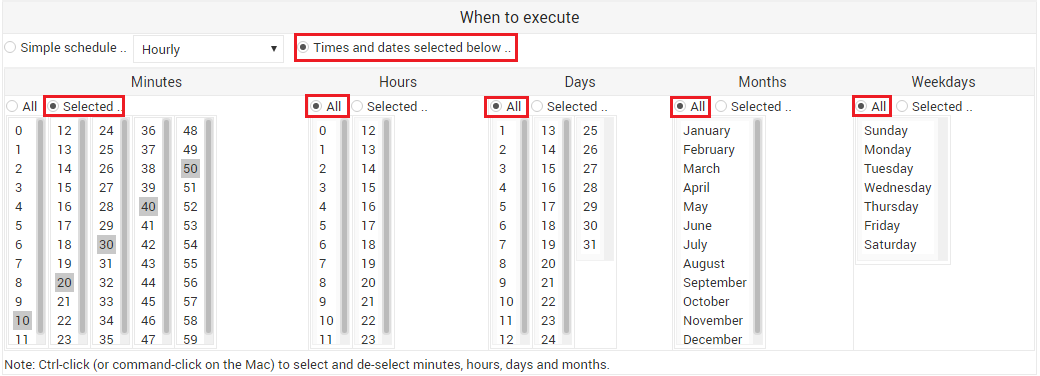
As you can see from the image, I’ve already selected 0, 10, 20, 30, 40 and 50 from the table under Minutes (Forgot the 0, don’t be me). These are minutes of an hour. Selecting in this pattern will make sure WordPress cron runs every 10 minutes starting from tenth minute. And since I’ve selected option All on all other settings, WordPress cron will run on 10, 20, 30, 40 and 50th minute of each hour. You can change these as you need. That concludes the When to execute section of set up WordPress Cron Jobs with Virtualmin tutorial. Let’s move to the last section.
Date range to execute
This section isn’t important to use since we want our cron job run forever. So just select Run on any date and click create. Your cron job will be saved to www-data user’s crontab and will be executed every 10 minutes as long as your server is online.
And that’s it. It may look like a bit complicated to set up WordPress Cron Jobs with Virtualmin for the first time. But it’s so much easier when you get used to the Virtualmin interface.

thanks, somehow when creating a subdomain with wordpress the main domain cronjob got overwritten, this helped me find the menu as I was looking at virtualmin not webmin.
I’m glad it helped.