ClamAV is important tool when it comes to the battle against day-to-day threats against Linux webservers. If you’re not using it already, this tutorial will show you how to install and configure ClamAV as a daemon on your
Ubuntu 20.04
machine.If you built your VPS following our Virtualmin & LEMP guide, chances are that you already have ClamAV installed on your server. In that case, you can skip the installation part and go directly to configuring it. But executing following commands won’t do any harm either.
How to Install ClamAV on Ubuntu VPS
Ubuntu 20.04
ships with ClamAV. You can simple install it with following commands.
apt install clamav clamav-daemon clamav-freshclam
This will only take few seconds. You can verify the installation by checking ClamAV version with following command.
clamscan -V
You should see an out put similar to below screenshot.

This means ClamAV is installed and running. You can continue to configure it in the next section.
How to Configure ClamAV on Ubuntu VPS
Although ClamAV is installed and running by now, it’s been as UNIX user clamav. This gives us permission problems when we want to use ClamAV with other software like Maldet (LMD). If you have been following our tutorials, you know that we use Maldet and inotify-tools with ClamAV for real-time malware scanning on our servers.
Maldet fails to use ClamAV for real-time scannings when ClamAV is run by another UNIX user. So, we need to configure ClamAV so it is run by the root user.
Open ClamAV configuration file with following command.
nano /etc/clamav/clamd.conf
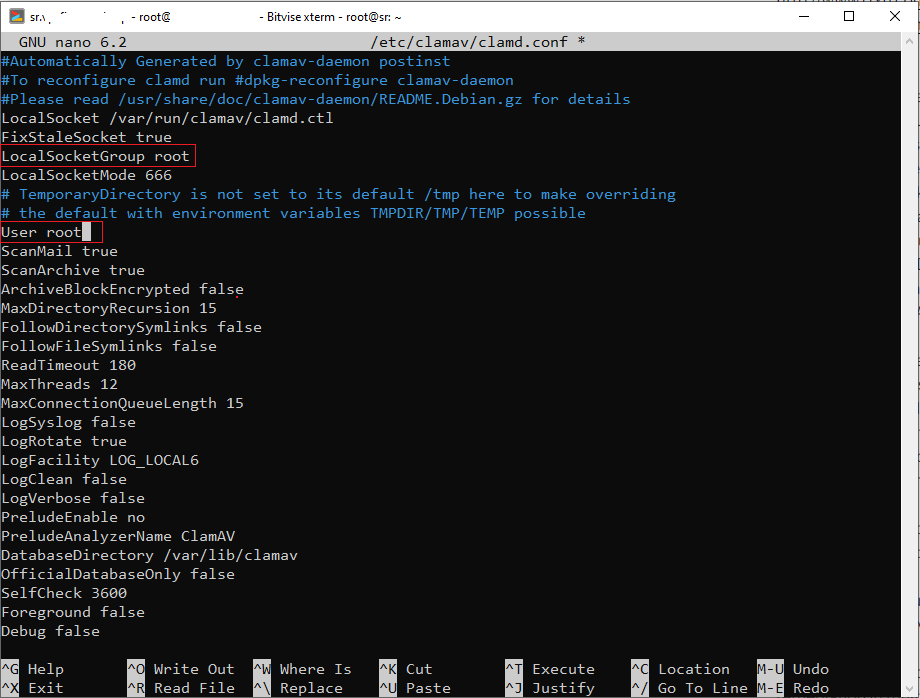
Now look for following two line within the file.
LocalSocketGroup clamav
User clamav
These two lines define the UNIX user group and UNIX user ClamAV will be run as. We need to replace clamav with root like below.
Close the file by hitting Ctrl + X keys on your keyboard. ANd then restart ClamAV Daemon.
systemctl restart clamav-daemon
How to Test ClamAV on Ubuntu VPS
Now that CLamAV is installed and appeared to be running, let’s do a small test to see if it’s actually working and detecting dangerous objects.
curl https://www.eicar.org/download/eicar.com.txt | clamdscan -
You should see an output like below.
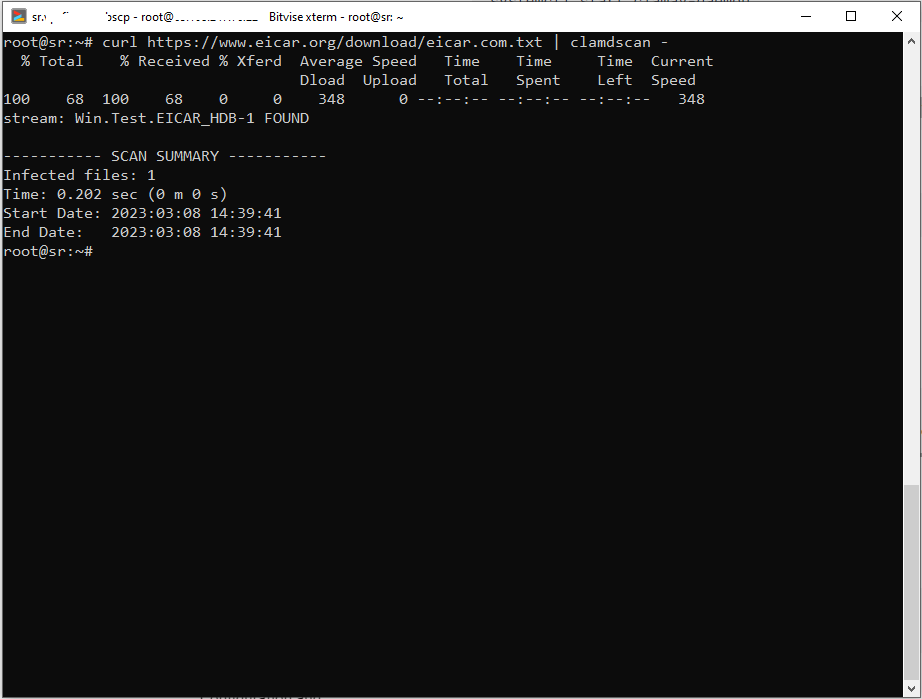
Congratulations! ClamAV has detected the infected file. BTW, it’s not a harmful file. It just simulates a malware, so you don’t need to worry about testing with it,