
MetaMask and Polkadot{.js} are both browser extensions. MetaMask extension interacts with Ethereum blockchain and Polkadot{.js} interacts with Polkadot.
Install Polkadot{.js} Extension
Head over to Polkadot{.js} official page and install the extension for your browser. Follow the onscreen instructions to backup your seed phrase and setup the wallet. We’ll come back to it in the next step.
Install MetaMask Extension
Head over to MetaMask official website and install the extension for your browser. You’ll have to go through a similar wallet setup process and backup the seed phrase. But there’s more for MetaMask. You need to add OriginTrail Parachain to your MetaMask wallet.
Add OriginTrail Parachain to MetaMask
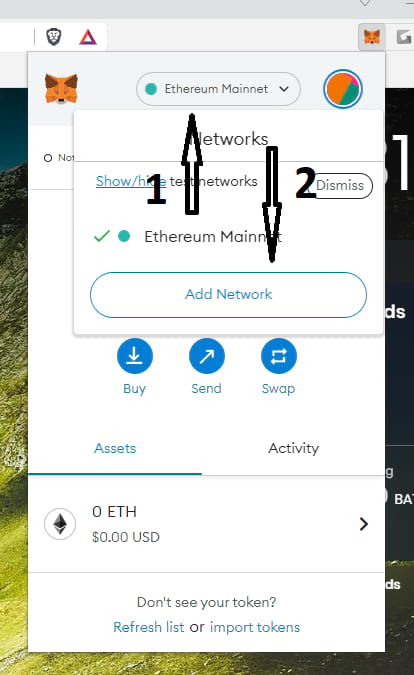
MetaMask runs on Ethereum mainnet by default. But we need to use OriginTrail Parachain for our node setup. Since the network isn’t included in the MetaMask. We need to add it manually.
Open your MetaMask by clicking the extension icon on your browser and click the dropdown menu that says Ethereum Mainnet (1). And then click Add Network (2) button at the bottom of the dropdown menu.
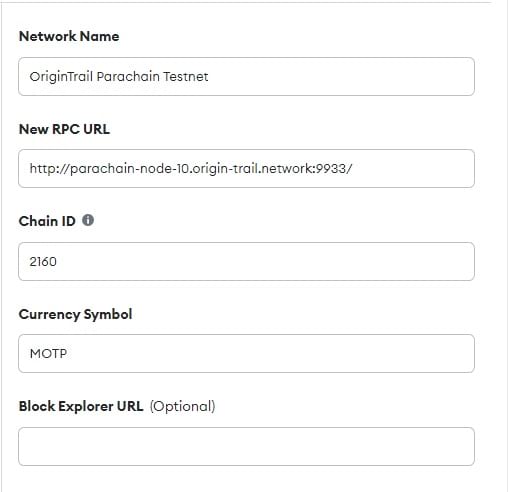
 It’ll open a new window where you can add a custom RPC network to MetaMask. Fill the form using follwing details and click Save.
It should look like this. Please don’t mind the RPC URL on the screenshot below. It can change over time.
You will need total of 4 wallets. A pair of wallets on each wallet extension you installed earlier. Which means, a pair of wallets on each network. These wallets are called Operational and Management wallets. The private keys for operational wallets will be used by ot-node. And for this reason, you’re advised to use it only for node operations and only deposit assets required for node functionality.
The private keys of the management wallet isn’t used by ot-node. So, it can be your main wallet where you keep your assets.
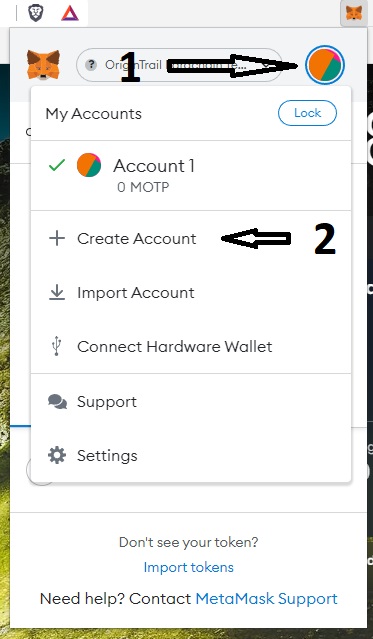
Create 2 EVM Wallets with MetaMask
Click the MetaMask icon on your browser and then click account icon on the top-right corner (1). Then click Create Account button from the dropdown menu (2). You need to create 2 accounts. So repeat the process 2 times.
Create 2 Substrate Wallets with Polkadot{.js}
Click Polkadot{.js} icon on your browser and click the big add new account button the create a new account. Follow the onscreen instructions to backup the seed phase and create your wallet. Repeat the process to create 2 wallets.
Each substrate account will give you 2 addresses. These will be visible on Polkadot{.js} extension and OriginTrail Parachain Devnet interface. One address will start with a “g” and the other address will start with number “5”. Both these addresses will represent one account and you can use both of them.
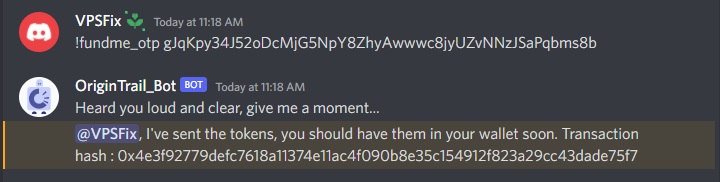
Bot will send you 6000 test OTP tokens and reply with following message.
 You can view your OTP token balance by visiting OriginTrail Parachain Devnet. You can only request test tokens once every 24 hours. Since you need OTP tokens on both your substrate accounts, you can use OriginTrail Parachain Devnet interface to transfer half of tokens to your other substrate account.
And like that, you can request TEST tokens for your MetaMask EVM operational wallet with following command, with wallet address swapped with yours of course.
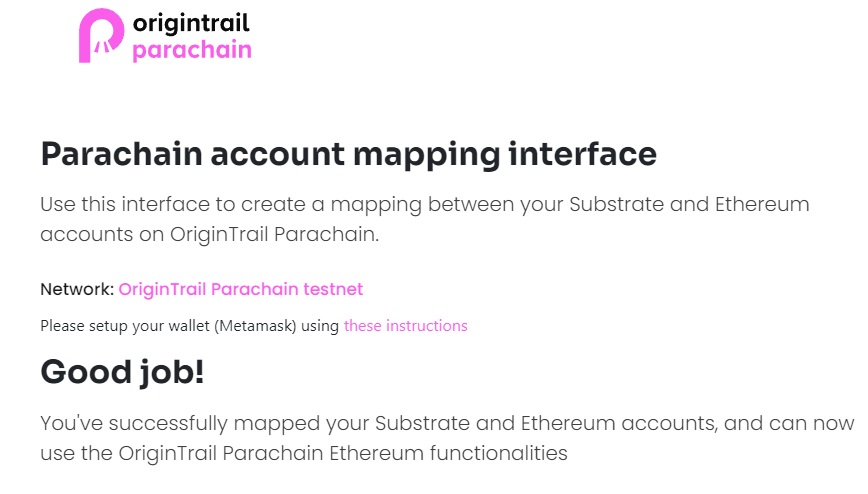
Before you can go ahead and install OriginTrail v6 test node on Ubuntu 22.04, you need to map your wallets between networks. Your EVM operational wallet needs to be mapped to your substrate operational wallet. And your EVM management wallet needs to be mapped to your substrate management wallet.
You can do this by going to OriginTrail Parachain account mapping interface. Follow the onscreen instructions to create mappings. Do this for both account pairs.
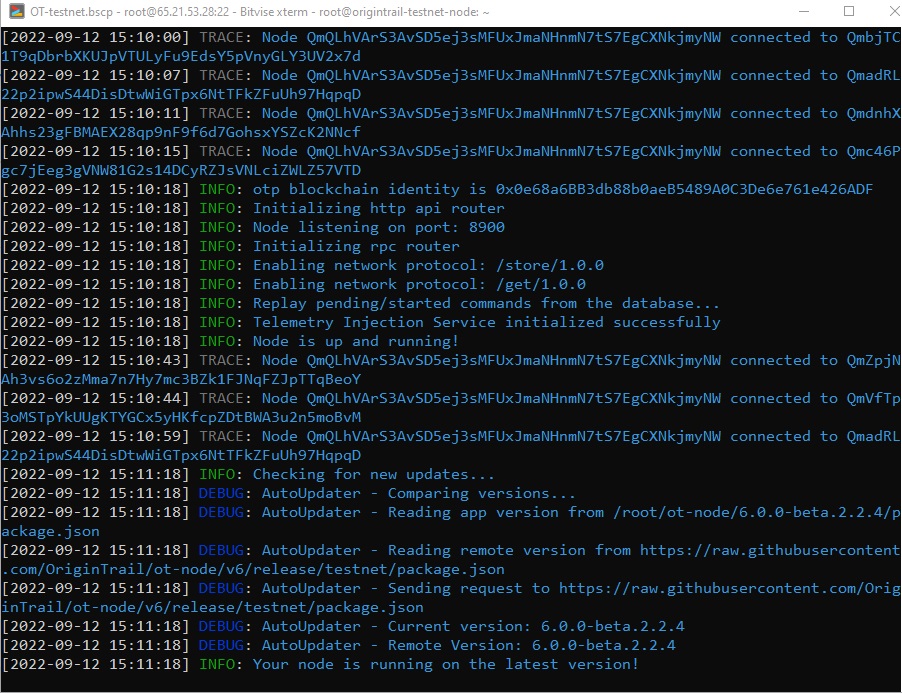
Above command will download and launch the installer script. It’ll guide you through the installation process. You’ll be asked to select a database during the installation. You’ll be given 2 options to select from. You should select Blazegraph as the other option isn’t working at the moment. You’ll see a screen similar to following when the installation is complete.
 You can hit Ctrl+C keys to disconnect from the node. It’ll keep running in the background even if you’re not connected.
Hello there,
Thank you very much for the shout out at the end. I finally had time to read your instructions and WoW ! Good job !! I’m thoroughly surprised to see somebody do such a lengthy setup instructions after being guided by me, and have I known, I would’ve given even more of my time to help out !
Here are a few things to correct:
1. The TEST token on OriginTrail Parachain is similar to GAS token on Ethereum blockchain.
This is false, TEST token is basically test TRAC token that is supposed to be the bread and butter of the entire Decentralized Knowledge Graph ecosystem. Publishing, holding assets, keyword staking and all other network activity revolving around the DKG will require TRAC. the gas token for OT Parachain is actually OTP (MOTP for testnet) which has other functionalities that I will not cover here. tracdeepdive.info/part1 tokenomics section cover the synergy between the hybrid token TRAC/OTP token model. It’s totally worth a read to understand their relationship further.
2. Before you can go head and install OriginTrail v6 test node on Ubuntu 22.04
Typo. Before you go ahead
3. Useful Commands to Manage OriginTrail Testnet Node
This part needs to be updated. At the end of my new installer that is awaiting team approval, I have added the following text:
New aliases added:
otnode-restart
otnode-stop
otnode-start
otnode-logs
otnode-config
To start using aliases, run:
source ~/.bashrc
The user has to manually input
source ~/.bashrc
after the installation because new aliases have been introduced and you need to re-source your bashrc file. The aliases are like shortcuts to more complex commands so you do not always have to type everything out. Therefore, you should replace the systemctll or journalctl commands for the new matching aliases above such as otnode-start.
That’s it for my feedback and I hope you appreciate it!
Great job again 🙂
I really appreciate you taking the time to read it and correct mistakes. I’ve updated the post. You have been a great help for anyone who’s looking to setup a node.