Self-Hosted version of Thrive Tracker offers unlimited click tracking for a little monthly fee. It’s a great way to track large number of clicks without going broke on monthly bills. This post lists steps to install Thrive Tracker on an AWS EC2 instance with free SSL certificate from Let’s Encrypt.
A domain name is a usual requirement for a publicly accessible application. You can get a domain from NameCheap. You can also use a subdomain since Thrive Tracker url won’t be visible to the end-user. However, it’ll be visible to your ad network.
Installing Thrive Tracker on AWS EC2 Instance requires few additional steps due to it being encrypted with ionCube. It also has specific PHP requirements. Thrive Tracker supports PHP 7.1 and PHP 5.4 to 5.6. Other PHP versions such as PHP 7.0 and PHP 7.2 are not supported. So we should build our EC2 instance with PHP 7.1.
Hire me and have your tracker ready within 24 hours!
Get Thrive Tracker Installed
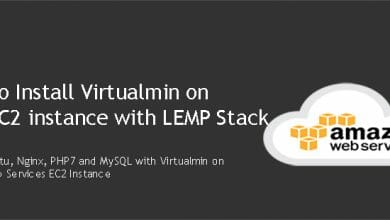
Step #1 – Create an EC2 instance for Thrive Tracker and install Virtualmin
First step is to create an EC2 instance and configure it to host websites. This task is little bit easier because we’re using Virtualmin. Virtualmin comes with an installation script that build the web server for us. But it still needs some work from us. Follow my four step tutorial to create an EC2 instance and install Virtualmin.
Tutorial: Install Virtualmin on AWS EC2 Instance
Step #2 – Disable MySQL Strict Mode for Thrive Tracker
Virtualmin installs MySQL 5.7 on the server with its initial configuration. MySQL 5.7 has strict mode enabled which isn’t supported by Thrive Tracker. Let’s disable it.
Tutorial: Disable MySQL Strict Mode on Ubuntu
Step #3 – Add your Thrive Tracker domain to Virtualmin
You should have a domain name or subdomain ready for Thrive Tracker by now. It’s time to add it to Virtualmin. Don’t forget to point your domain to EC2 instance with an A record.
Tutorial: Add a domain to Virtualmin
Step #4 – Install PHP 7.1 for Thrive Tracker
Virtualmin configures server with PHP 7.0. But this is not supported by Thrive Tracker either. But fortunately Virtualmin is capable of handling multiple PHP versions. Follow my tutorial and install PHP 7.1 on your EC2 instance.
Tutorial: Use Multiple PHP versions with Virtualmin
Step #5 – Install Let’s Encrypt SSL certificate for Thrive Tracker on AWS EC2
Virtualmin has Let’s Encrypt support build in. We can take advantage of this and secure Thrive Tracker on AWS EC2 with free SSL. Follow below tutorial to complete fifth step of Install Thrive Tracker on AWS tutorial.
Tutorial: Install Let’s Encrypt SSL Certificate for Thrive Tracker with Virtualmin
Step #6 – Redirect http to https with Virtualmin
Now that we have free SSL for Thrive Tracker, we should make sure no one can access non-secure version. The http version in other words. We can simply close port 80 on firewall. But right way to handle it is to redirect insecure traffic to https.
Tutorial: 301 Redirects from http to https with Virtualmin
Step #7 – Install ionCube Loaders for PHP 7.1
We’re getting closer to install Thrive Tracker on AWS EC2 instance. One of the main requirements of Thrive Tracker is ionCube Loaders. Follow my tutorial to install ionCube Loaders on your EC2 instance.
Tutorial: Install ionCube Loaders for PHP 7.1
Step #8 – Install Thrive Tracker on AWS EC2 instance with Virtualmin
Finally, we can go ahead and install Thrive Tracker on our EC2 instance. This step involves uploading Thrive Tracker files to EC2 instance using sftp and running the installer. And then we’ll finish the installation by creating Thrive Tracker cronjobs with Virtualmin.
Tutorial: Install Thrive Tracker with Virtualmin
That should do it. Create a topic on our sysadmin forum if you have issues with this setup.