An SSL Certificate is an encrypted file that is sent from the website to the user’s browser. This file verifies the identity of the website and demonstrates that the connection between the user and the website is encrypted. This extra layer of security guarantees the customer that they are purchasing from a genuine website whose identity has been verified with a trusted source.
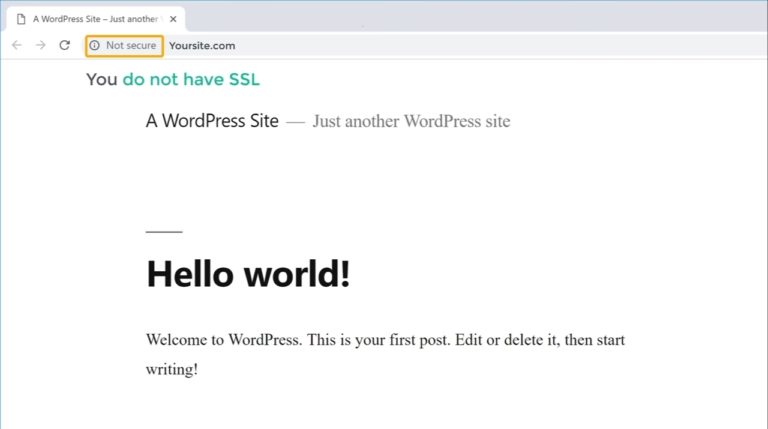
If you go to your website and see Not secure message on your browser like in the image below, you do not have SSL installed. If you want to change this unsecured message into the secured padlock symbol, You need to get an SSL certificate for your website. Let’s see how you can get free SSL for your WordPress website. It will make your visitors to trust your website.
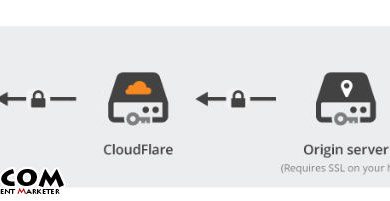
You can get free SSL in just five steps using Cloudflare.
Step #1 - Create a Cloudflare Account
Cloudflare is a website that is going to give us free SSL. You need to create an account on Cloudflare. First, go to Cloudflare and click signup. and enter your email and password, then click create an account. Now your account is created.
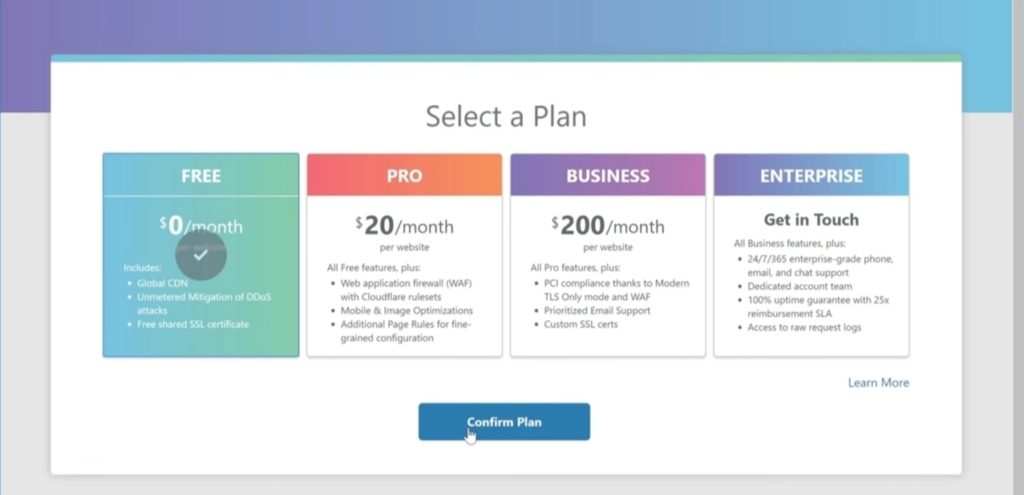
Step #2 - Add your Website to Cloudflare
Now you need to ‘Add your website to this account.’ So enter your website name (Domain). Then click add site and click Next. Now select the free plan. And click confirm. Then scroll down and click continue. Currently, your website has been added to Cloudflare.
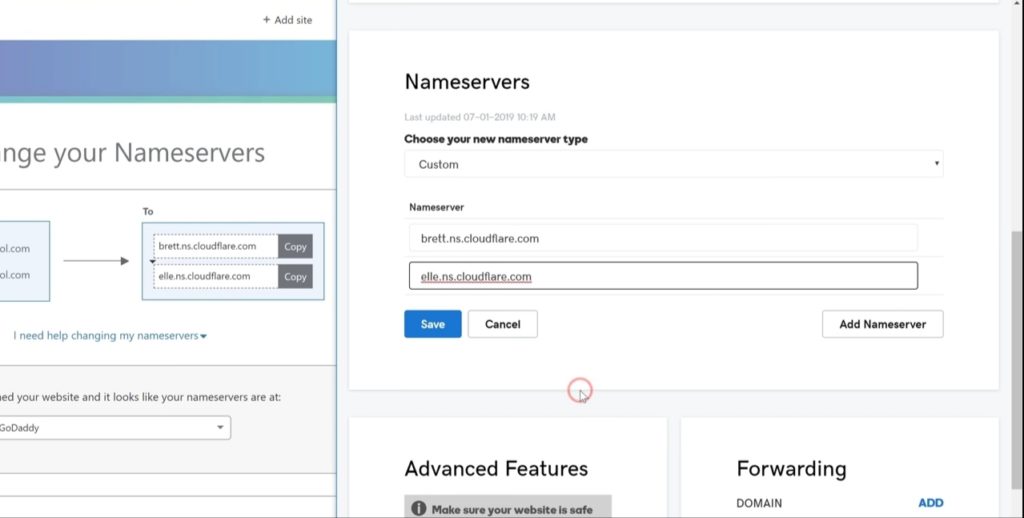
Step 3 - Change your Nameserver
Cloudflare will give you set of nameservers. You need to add these Cloudflare nameservers to your domain. To do that, you need to first login to your domain provider’s website. So to add these nameservers, if your domain provider is GoDaddy, you need to login to GoDaddy, Then you need to change the nameservers of your domain with the ones provided by Cloudflare. Copy the Cloudflare nameservers and paste them to your domain nameservers. And click save. Now you have successfully added the nameservers to your domain.
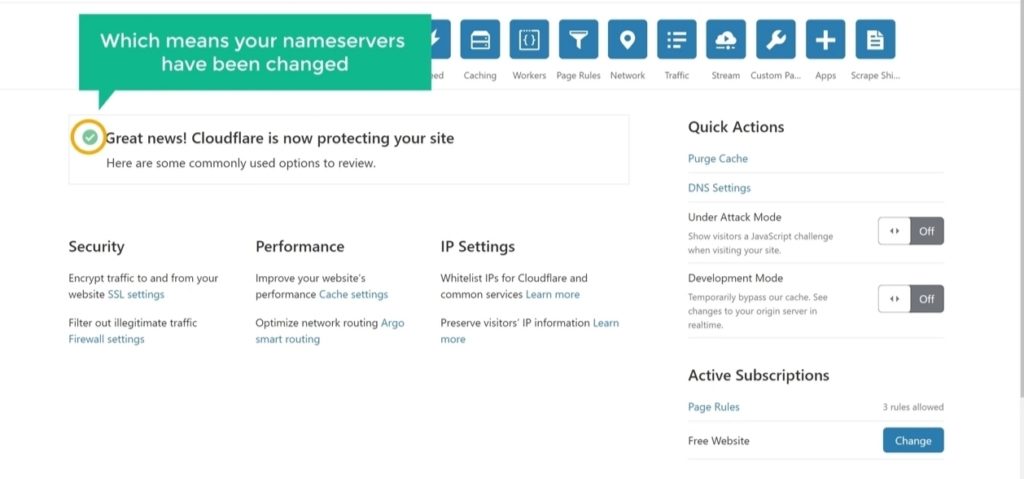
Go back to Cloudflare and then click continue. Now check if the nameservers are changed. Click recheck now, and you will get this message. Which means your nameservers have been changed.
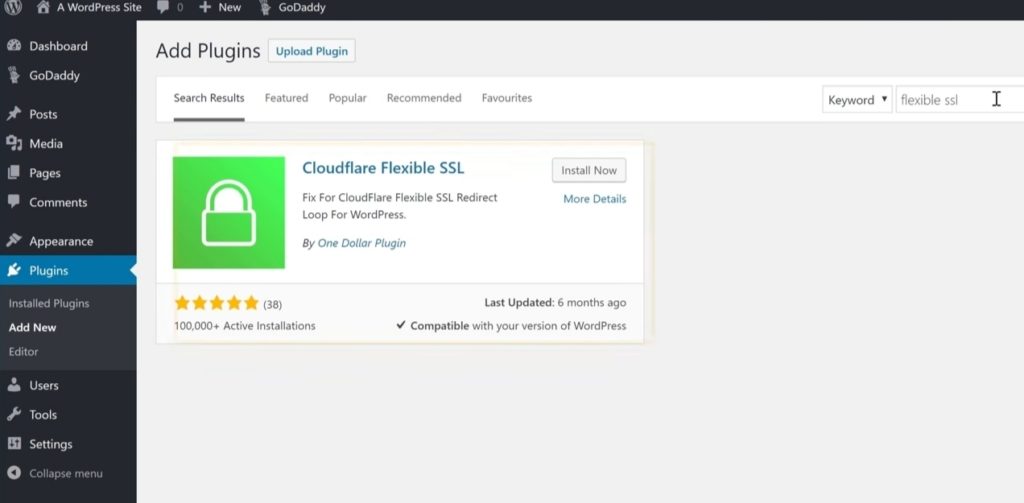
Step #4 - Install Cloudflare Flexible SSL Plugin
Install the Cloudflare plugin in WordPress. So to install the plugin, Go to your WordPress dashboard and then go to plugins. And click add new. Search for Flexible SSL. And you will get this plugin. Now install this plugin by clicking install and activate. Now you have installed the Cloudflare plugin in WordPress.
Step 5 - Enable Cloudflare SSL
Go back to Cloudflare website and then click the padlock icon from the menu which says SSL/TLS. Set your Your SSL/TLS encryption mode to Flexible. Now your website is secured with SSL.
If your site doesn’t load properly, wait for a few minutes and then load it from a different device. It will work after a few minutes. These instructions should work for any shared hosting provider out there. If you’re on a VPS with nginx webserver, you might want to refer to Setting up Cloudflare Free SSL for WordPress on Nginx article.