
Sendy can be used to send bulk emails/newsletters to your lists for a fraction of the cost of other providers. This tutorial will show you how to install Sendy on VPS with Virtualmin control panel and nginx web server for maximum performance.
Prerequisites
Sendy is a self hosted software, which means you need hosting space to run it. You can install it on shared hosting, but it will be unstable. Instead you can get a 2GB RAM cloud VPS from one of the leading providers and follow this tutorial to install Sendy on VPS with Virtualmin control panel. The costs will be the same and you’ll get a stable installation of Sendy.
Before you install sendy on VPS, you need to complete following steps,
After you’re done all those things, you can follow below instructions to install Sendy on newly created virtual server.
Need Sendy Installed?
Would you rather have an experienced Linux Server Administrator configure your VPS and install Sendy for you? Get it done the right way!
- Virtualmin Control Panel
-
Nginx v1.22
Webserver -
PHP v8.0
andMySQL v8
- Free SSL for Sendy
- And more...
Monthly VPS Management
Get a professional Linux Server Administrator maintain your VPS on daily basis for a small monthly fee. Our service include,
- Daily Malware Scanning
- Daily Off-site Backups
- Enhanced Server Security & Firewall
- Weekly Server Updates & patches
- And more...
Upload Sendy to the Server
Start by extracting Sendy installation package to a local folder. You’ll find installation files inside the sendy directory. Everything in this folder should be uploaded to the public_html directory on the virtual server you created for your domain. You can use FileZilla to upload files to your server. Make sure to use the administrative username for the domain when connecting with FileZilla.
Prepare Sendy for Installation
Once everything have been uploaded to the server, login to your VPS as admin user of the domain over SSH and open config.phpwith nano text editor.
nano $HOME/public_html/includes/config.php
Search for the following line and replace your_sendy_installation_url with your domain name.
nano define('APP_PATH', 'https://your_sendy_installation_url');Then search for following lines and add database credentials within apostrophe marks. You can get MySQL database credentials from Virtualmin.
	$dbHost = ''; //MySQL Hostname
	$dbUser = ''; //MySQL Username
	$dbPass = ''; //MySQL Password
	$dbName = ''; //MySQL Database Name
Close the file. Now change permissions of the uploads directory to 777.
chmod -R 777 /home/AdminUserName/public_html/uploads
Add nginx Rewrite Rules for Sendy
nano /etc/nginx/sites-available/example.com.confSearch for following line,
fastcgi_param HTTPS $https;And paste following nginx rewrite rules below it in a new line.
location / {
        if (!-f $request_filename){
                rewrite ^/([a-zA-Z0-9-]+)$ /$1.php last;
        }
}

location /l/ {
        rewrite ^/l/([a-zA-Z0-9/]+)$ /l.php?i=$1 last;
}

location /t/ {
        rewrite ^/t/([a-zA-Z0-9/]+)$ /t.php?i=$1 last;
}

location /w/ {
        rewrite ^/w/([a-zA-Z0-9/]+)$ /w.php?i=$1 last;
}

location /unsubscribe/ {
        rewrite ^/unsubscribe/(.*)$ /unsubscribe.php?i=$1 last;
}

location /subscribe/ {
        rewrite ^/subscribe/(.*)$ /subscribe.php?i=$1 last;
}

location ~* \.(ico|css|js|gif|jpe?g|png)(\?[0-9]+)?$ {
        expires max;
        log_not_found off;
}
Close the file and restart nginx.systemctl restart nginx.service
Install Sendy onUbuntu 20.04
http://example.com/_compatibility.php?i=1If you have 8/9 score, you have everything Sendy needs on your server.
8/9 Compatibility Score
Now open your domain name with your favorite browser. You’ll see a page similar to this image.
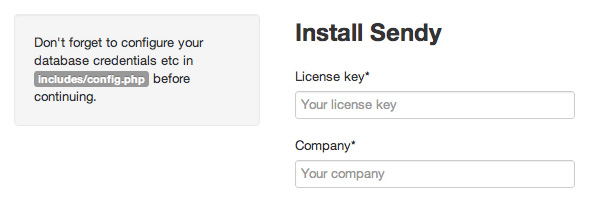
Follow the instructions on that page to complete the Sendy installation. Once you do that Sendy installation is complete for the most part. But Sendy requires Cron jobs set up for campaign scheduling and autoresponders.
Setup Sendy Cron Jobs
There are four cron jobs to be added. One for campaign scheduling, one for autoresponders, one for csv import and one for segment updates. You can use Virtualmin to setup cron jobs. Settings can be found at Webmin > System > Scheduled Cron Jobs. But I find it easier to do it from command line. So login to your server as domain admin user and issue following command.
crontab -e
Since you’re opening crontab for the first time, you will be asked to select an editor. Select nano text editor as it’s the easiest to use from the bunch. Crontab will open and you’ll see few Virtualmin related cronjobs. Add following commands at the end of the file.
*/5 * * * * php /home/AdminUser/public_html/scheduled.php > /dev/null 2>&1
*/1 * * * *  php /home/AdminUser/public_html/autoresponders.php > /dev/null 2>&1
*/5 * * * *  php /home/AdminUser/public_html/import-csv.php > /dev/null 2>&1
*/15 * * * *  php /home/AdminUser/public_html/update-segments.php > /dev/null 2>&1
Replace AdminUser with your Sendy server admin username. Save and close file. Your Sendy is now ready to use.
If you have issues with these instructions or the installation create a topic on server administration forum.

Hi,
I’ve been using your guide here to get sendy installed on an AWS instance. All has been well except that the rewrite rules do not seem to be working. I’ve checked and double checked the rules and it is correct. Any ideas why this would not be working?
Thanks
Hi Michael,
Were you able to restart nginx without errors?
Yes. no errors.
I figured out what it was. I installed sendy in a subdirectory, i.e. /sendy Your rules assumed it was installed in the root of public_html. I used the following rules below, although condensed. Things are working fine now.
location /sendy {
access_log off;
error_log off;
rewrite ^/sendy/(l|t|w)/([a-zA-Z0-9\/]+)$ /sendy/$1.php?i=$2&$args;
rewrite ^/sendy/(u?n?subscribe)/(.*)$ /sendy/$1.php?i=$2&$args;
try_files $uri $uri/ $uri.php?$args;
}
Cheers,
Michael
Glad you figured it out. I have another tutorial for Sendy on a sub directory with nginx & Virtualmin.