Elgg allow individuals and organizations to create social apps with PHP and MySQL. Elgg is a self-hosted social networking engine, capable of building social networks for your university, school, college or organization. This tutorial will show you how to install Elgg on
Ubuntu 20.04
VPS with Virtualmin & Nginx.Elgg is extremely easy to use. It has a simple user interface. Yet, highly customizable. Users can extend functionality of Elgg with more than 2200 plugins and themes available on Elgg’s plugin directory.
By following this Elgg installation guide, you’ll build your web server with Virtualmin v7.1 GPL Nginx v1.22 PHP v8.0 MySQL v8
Hire me and have your Elgg ready within 24 hours!
Get Elgg Installed
Prerequisites
This tutorial assumes you have a
Ubuntu 20.04
VPS. You can get one from my recommended VPS providers if you don’t have one already. Once you get a VPS, you need to complete following steps,Completing above steps will convert your VPS into a web server. You can skip optional steps. But you shouldn’t if you want a perfect hosting environment for your Elgg community.
Prepare VPS for Elgg
Completing prerequisites get your VPS ready for most application out there. But we’ll need Composer installed on the server to install Elgg. Which isn’t covered on the prerequisites. So let’s take care of that.
Install Composer
Composer is a dependency management tool for PHP. We’ll need it since we’re building Elgg from Github repository. Following commands will install it. You need to execute these commands as root user.
curl -sS https://getcomposer.org/installer -o composer-setup.php
php composer-setup.php --install-dir=/usr/local/bin --filename=composer
Install Elgg
Now we can use composer to download and install Elgg on our VPS. You need to execute these commands as your Elgg domain’s admin user. So login to server as domain admin user and navigate to home directory.
cd $HOME
Virtualmin creates a public_html directory for each domain you add. We should install Elgg on this directory. But we’ll delete it for now.
rm -rf $HOME/public_html
Following commands will create public_html directory again and download Elgg package to it.
composer global require "fxp/composer-asset-plugin:~1.3"
composer create-project elgg/starter-project:dev-master public_html
Navigate to public_html directory.
cd public_html
Install Elgg with Composer.
composer install
Do it again.
composer install
Create Data Directory for Elgg
Elgg needs a special folder to store uploaded files including profile icons and photos. Official documentation suggests that we use a directory outside of public_html for this. Let’s take care of that too.
mkdir $HOME/elgg-data
Above command will create directory named elgg-data in domain’s home directory. Absolute path to it is /home/AdminUser/elgg-data. Which is outside of the public_html directory. You’ll be asked for this folder during Elgg web installation.
Configure Nginx for Elgg
Elgg needs special rewrite rules to be compatible with Nginx web server. You should add them to nginx configuration file of your domain. This needs to be done with the root account of your VPS. So log back into root account and open nginx configuration file for the domain with this command.
nano /etc/nginx/sites-available/example.com.conf
Replace example.com with your domain name. Look for following line within the file (Ctrl+W).
fastcgi_param HTTPS $https;
And paste these rules BELOW that line,
    location = /rewrite.php {
        rewrite ^(.*)$ /install.php;
    }

    location / {
        try_files $uri $uri/ /index.php?__elgg_uri=$uri&$query_string;
    }
Save and close file by hitting Ctrl+X and then Y. Then restart nginx web server,
service nginx restart
That should get your Elgg up and running. You’ll be able to run Elgg web installer now. But we’ll configure cronjobs for Elgg before doing that.
Create Elgg Cronjobs
Elgg needs cronjobs setup for its background tasks. These include sending out queued notifications, rotating the system log in the database and collecting garbage in the database. We’ll add cron rules suggested by Elgg documentation. You should switch to domain admin user for this part. And open crontab with following command.
crontab -e
You’ll be asked for a editor to use for editing. Nano is the easiest option. Append the file with following rules. Remember to replace http://www.example.com/ with you Elgg URL.
# Location of your site (don't forget the trailing slash!)
ELGG='http://www.example.com/'

# Location of lwp-request
LWPR='/usr/bin/lwp-request'

# Make GET request and discard content
GET="$LWPR -m GET -d"

# The crontab
# Don't edit below this line unless you know what you are doing
* * * * * $GET ${ELGG}cron/minute/
*/5 * * * * $GET ${ELGG}cron/fiveminute/
15,30,45,59 * * * * $GET ${ELGG}cron/fifteenmin/
30,59 * * * * $GET ${ELGG}cron/halfhour/
@hourly $GET ${ELGG}cron/hourly/
@daily $GET ${ELGG}cron/daily/
@weekly $GET ${ELGG}cron/weekly/
@monthly $GET ${ELGG}cron/monthly/
@yearly $GET ${ELGG}cron/yearly/
# reboot is deprecated and probably doesn't work
@reboot $GET ${ELGG}cron/reboot/
Close the file and run the Elgg web installer in the next step.
Run Elgg Setup Wizard
Open your domain in the browser to complete Elgg installation. You’ll see a page like below.
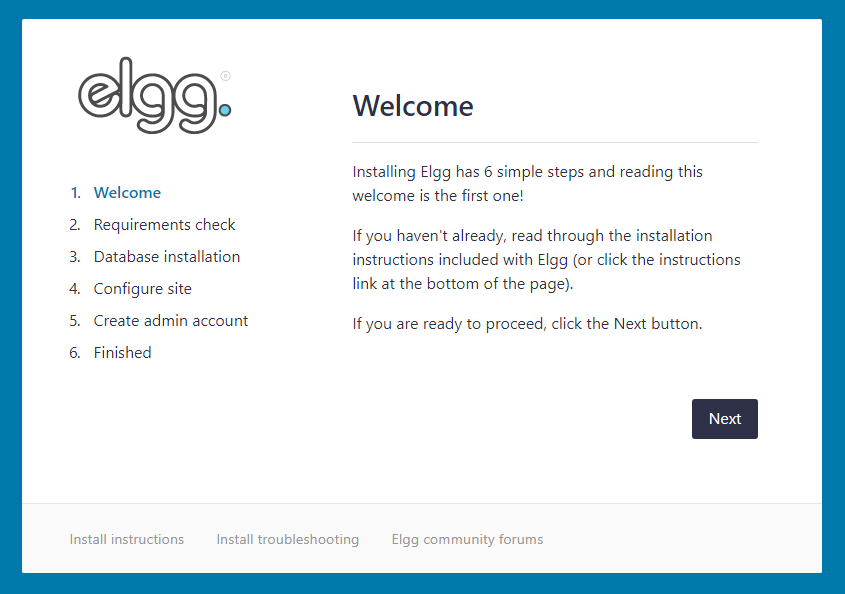
Installer will guide you through the installation. It’ll ask you for MySQL credentials, which you can get from Virtualmin and the path to data directory which we created earlier.
That concludes the instructions to install Elgg on
Ubuntu 20.04
VPS with Virtualmin and Nginx. Create a topic on sysadmin forum if you have issues with the installation.